Set up and configure NGINX on an Ubuntu server using AWS
Hello there. Trust you're good today. Today, I will be doing a walkthrough on how I set up and configured Nginx on an Ubuntu server using AWS EC2.
P/S: This blog post is to fulfil the HNG internship stage 0 task.
Without foda ado, let's go!
Requirements
— A VM (virtual machine): locally set up a VirtualBox or use a cloud provider like AWS, Azure, or GCP (Google cloud platform).
Approach
I'll be using AWS cloud.
— Step 1: Started the Launch EC2 instance process
— Step 2: Entered the name for the instance and selected an Ubuntu AMI (Amazon Machine Image).

— Step 3: Set up my auth credentials. AWS uses only secure shell authentication. To access my server seamlessly via SSH, I created my key pair. Once every information was provided, the pair was created and automatically downloaded to my local device.

— Step 4: Set up my network settings. I set up a new security group and selected only the option that allows only HTTP traffic, since the task requires our IP runs only on port 80.
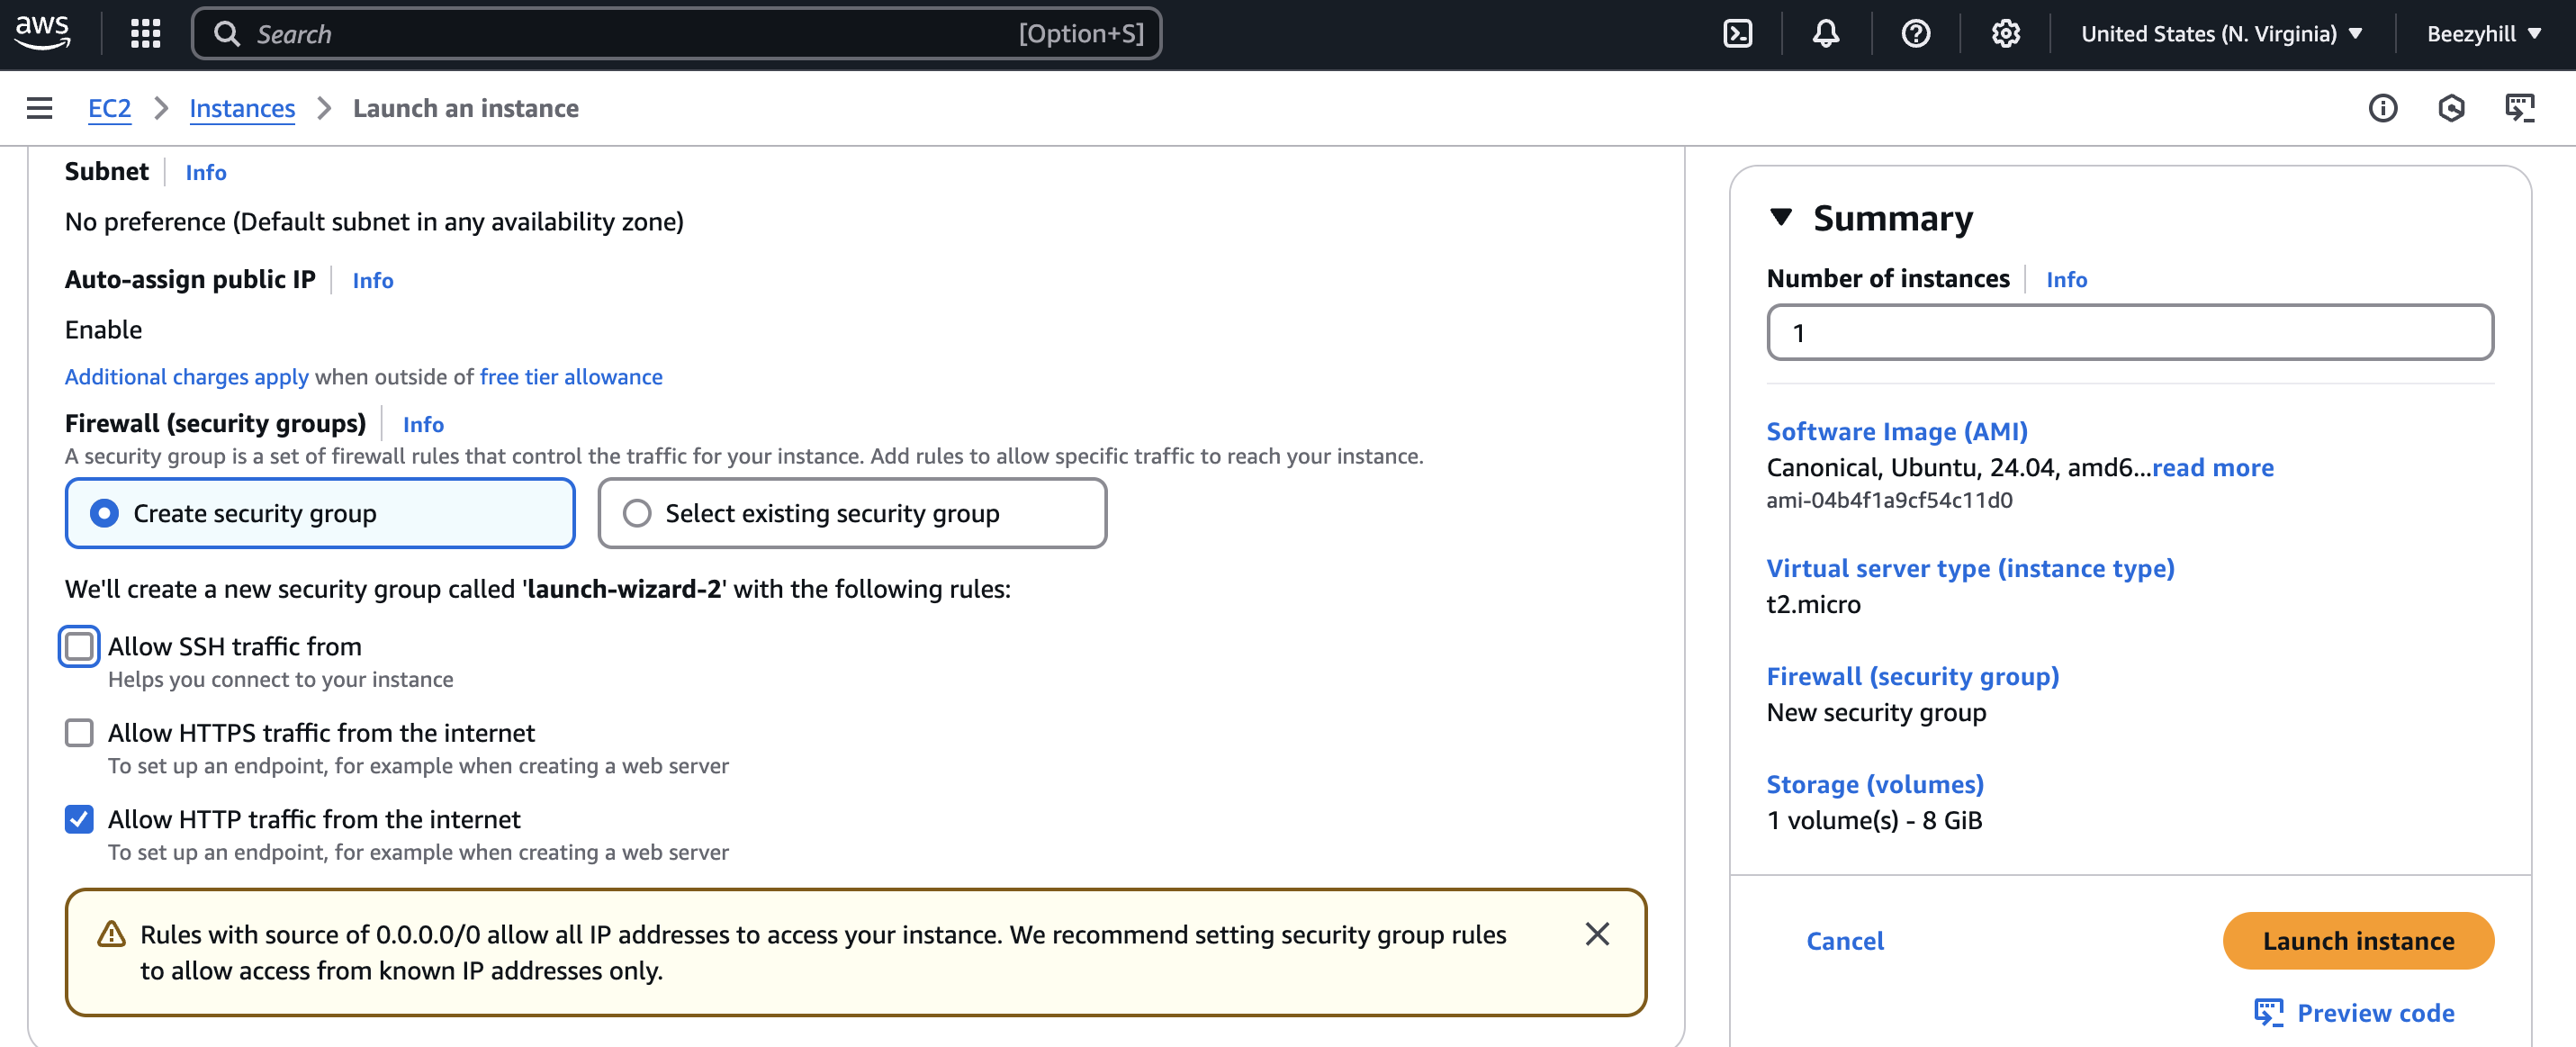
— Step 5: Configured my machine storage, setting it to 10 GB.

— Step 6: Needed advanced settings, so I utilized the user data feature to write scripts to automate everything I needed without logging into the Ubuntu server.
#!/bin/bash

sudo apt update && sudo apt upgrade -y

sudo apt install nginx -y

sudo systemctl enable nginx

sudo systemctl start nginx

cd /var/www/html

cat <<EOF > index.html
<!DOCTYPE html>
<html lang="en">
<head>
    <meta charset="UTF-8">
    <meta name="viewport" content="width=device-width, initial-scale=1.0">
    <title>HNG Task Stage 0</title>
</head>
<body>
    Welcome to DevOps Stage 0 - Chiamaka Daniel-Paul/beezyhill
</body>
</html>

EOF
Here's a breakdown of my user data script:
- First line, is a bash declaration, this is necessary to let the system know what type of interpreter would execute this script, in my case bash.
Second line, download any package updates and upgrades where necessary.
Third line, install nginx.
Fourth line, enable nginx service.
Fifth line, start the nginx service.
Sixth line, change directory to the specified path.
Seventh line, this command creates the index.html file and writes a piece of HTML code which would be served as a web page.
— Step 7: Finally, I launched my instance! Once my instance was up and running, with all status checks passed.
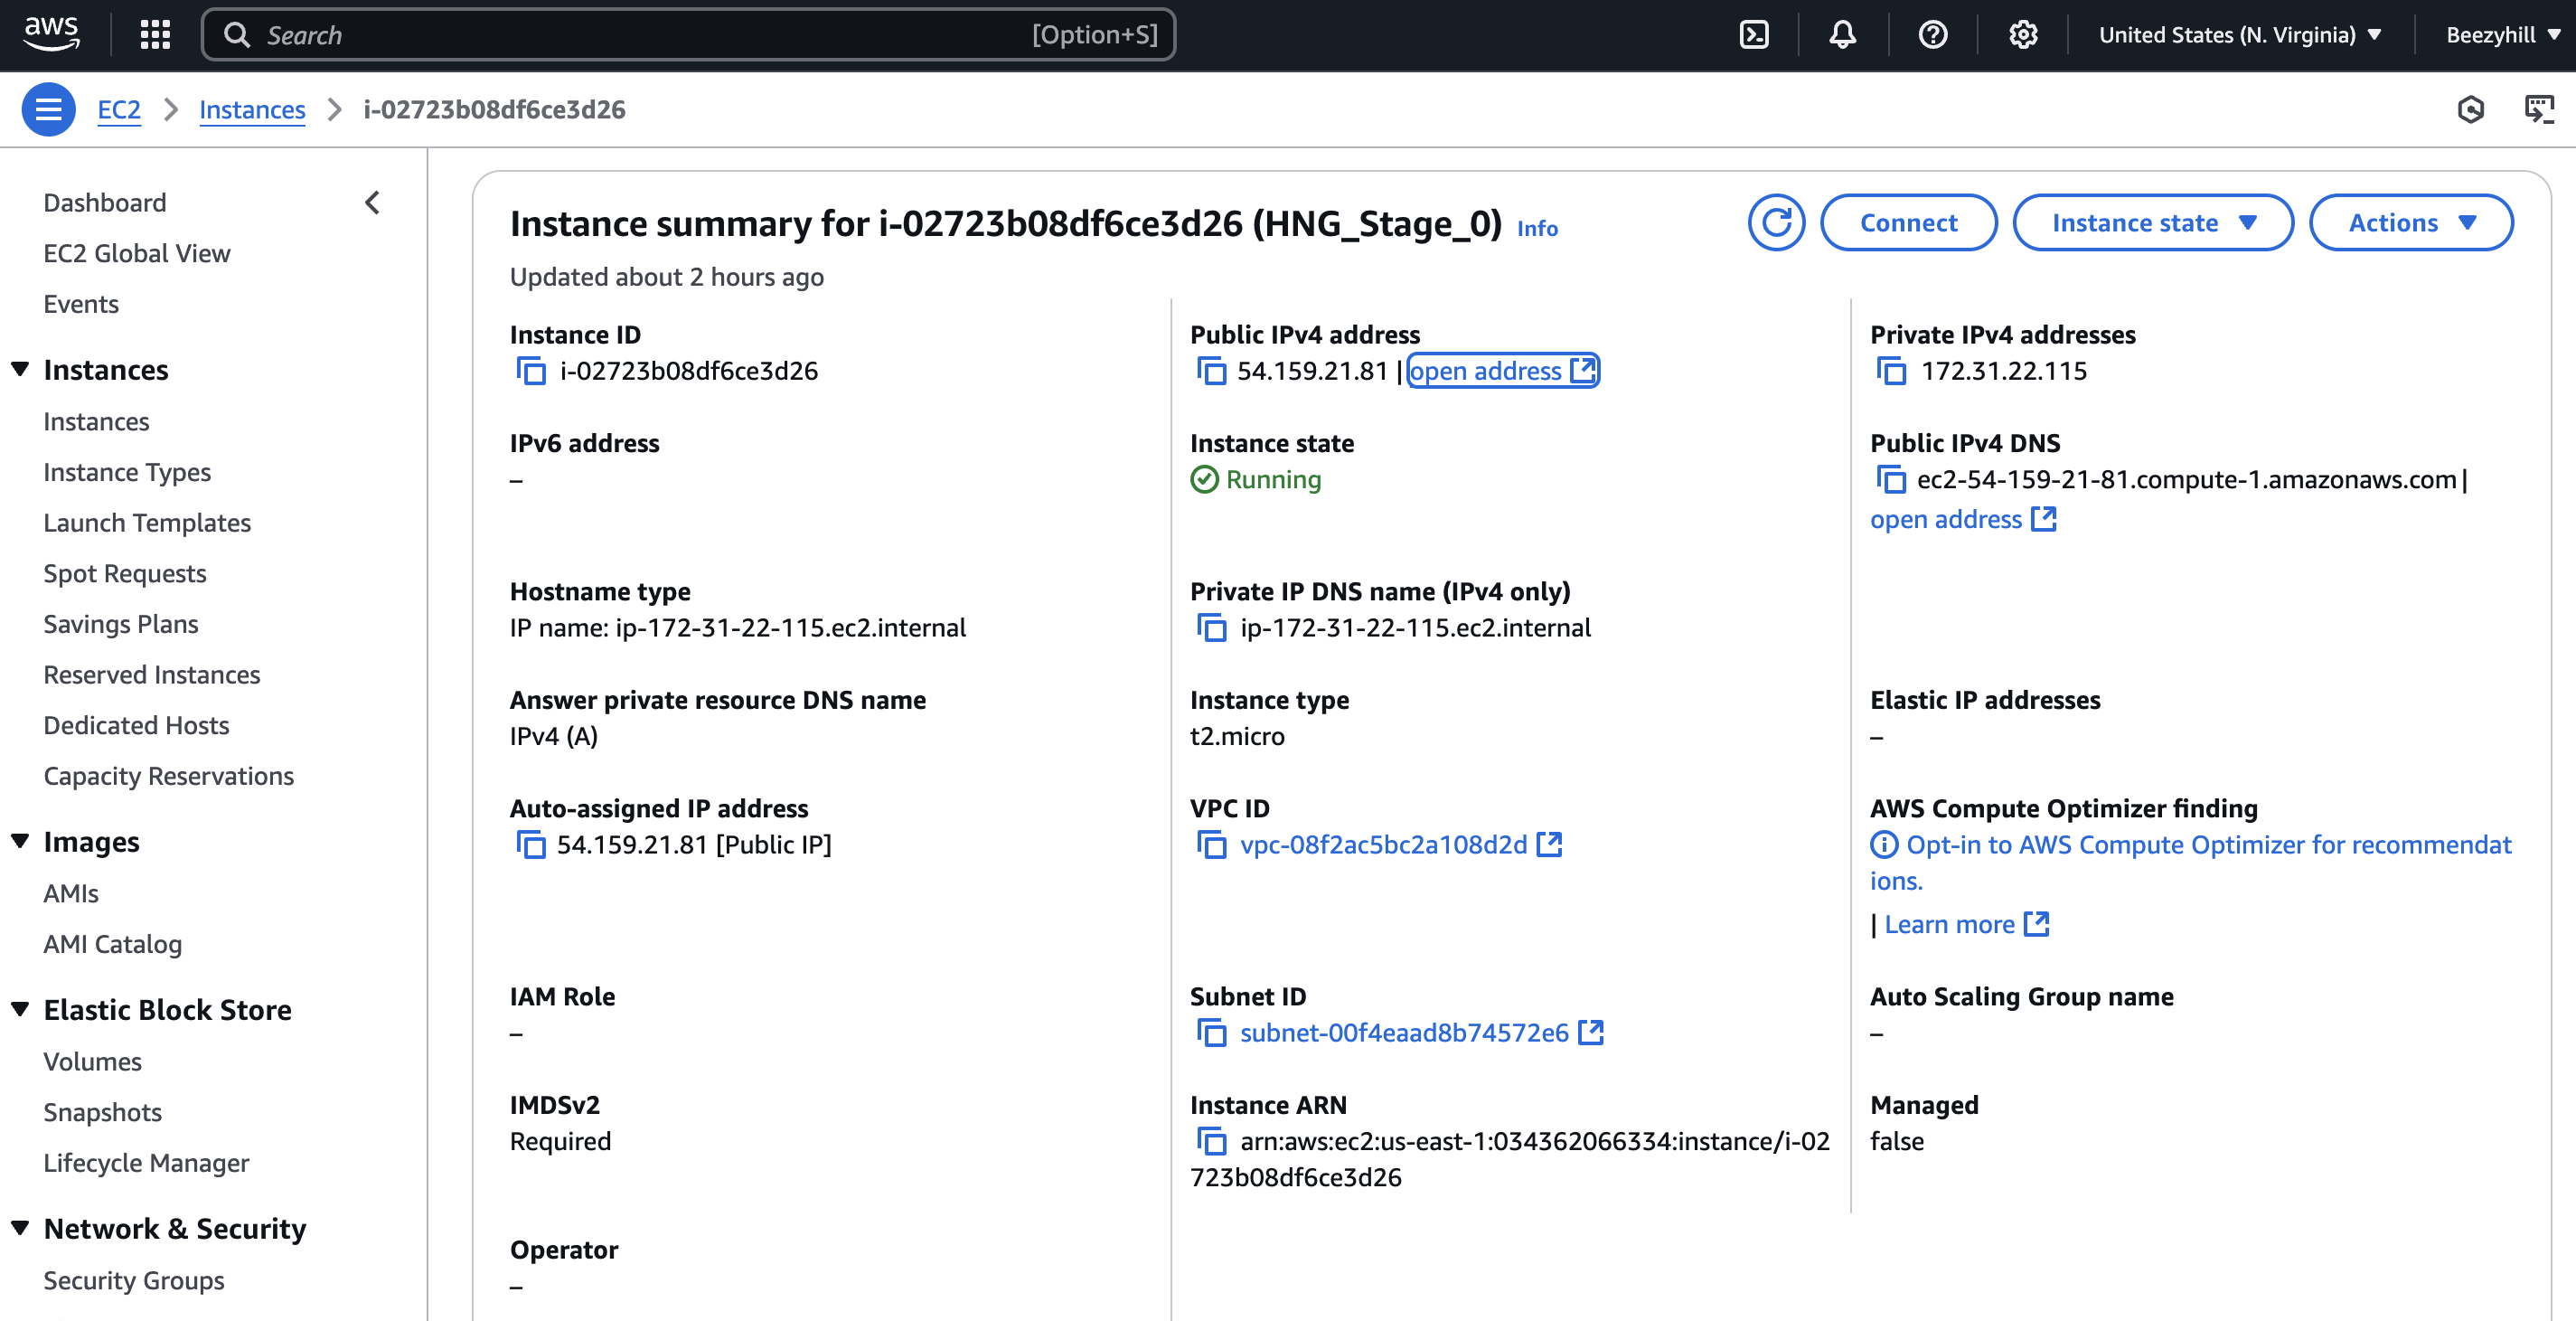
Appears everything was done well. Now, I can easily access my web page using the public IP address. Here's mine.
Challenges & Solutions
First challenge, I couldn't access my web page. Everything was properly set up on security group, I thought I was doing something wrong. Then, I realized I was passing HTTPS instead of HTTP. Of course, this wouldn't work because I set my security inbound rule to only accept port 80.
Second challenge, setting only port 80 in my security group. This was crazy because I still needed to create an index HTML page and that requires I ssh into the Ubuntu server. Well, I found a different way -- using user data to write a script to automate everything without logging into my instance.
Personal Growth
This task challenged me to think outside my normal way of spinning up instances, normally, I create the instance, SSH into it, and install everything needed to get my program running. I improved on the area of scripting, a great win!